The Cut-Flower Gardener's Guide to Growing Tall Zinnias
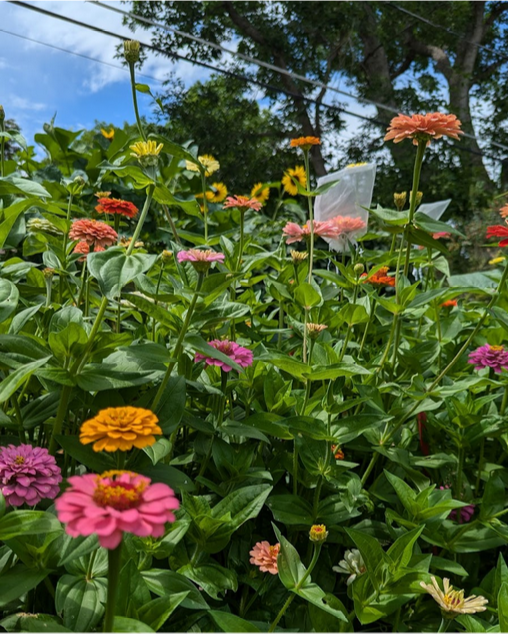
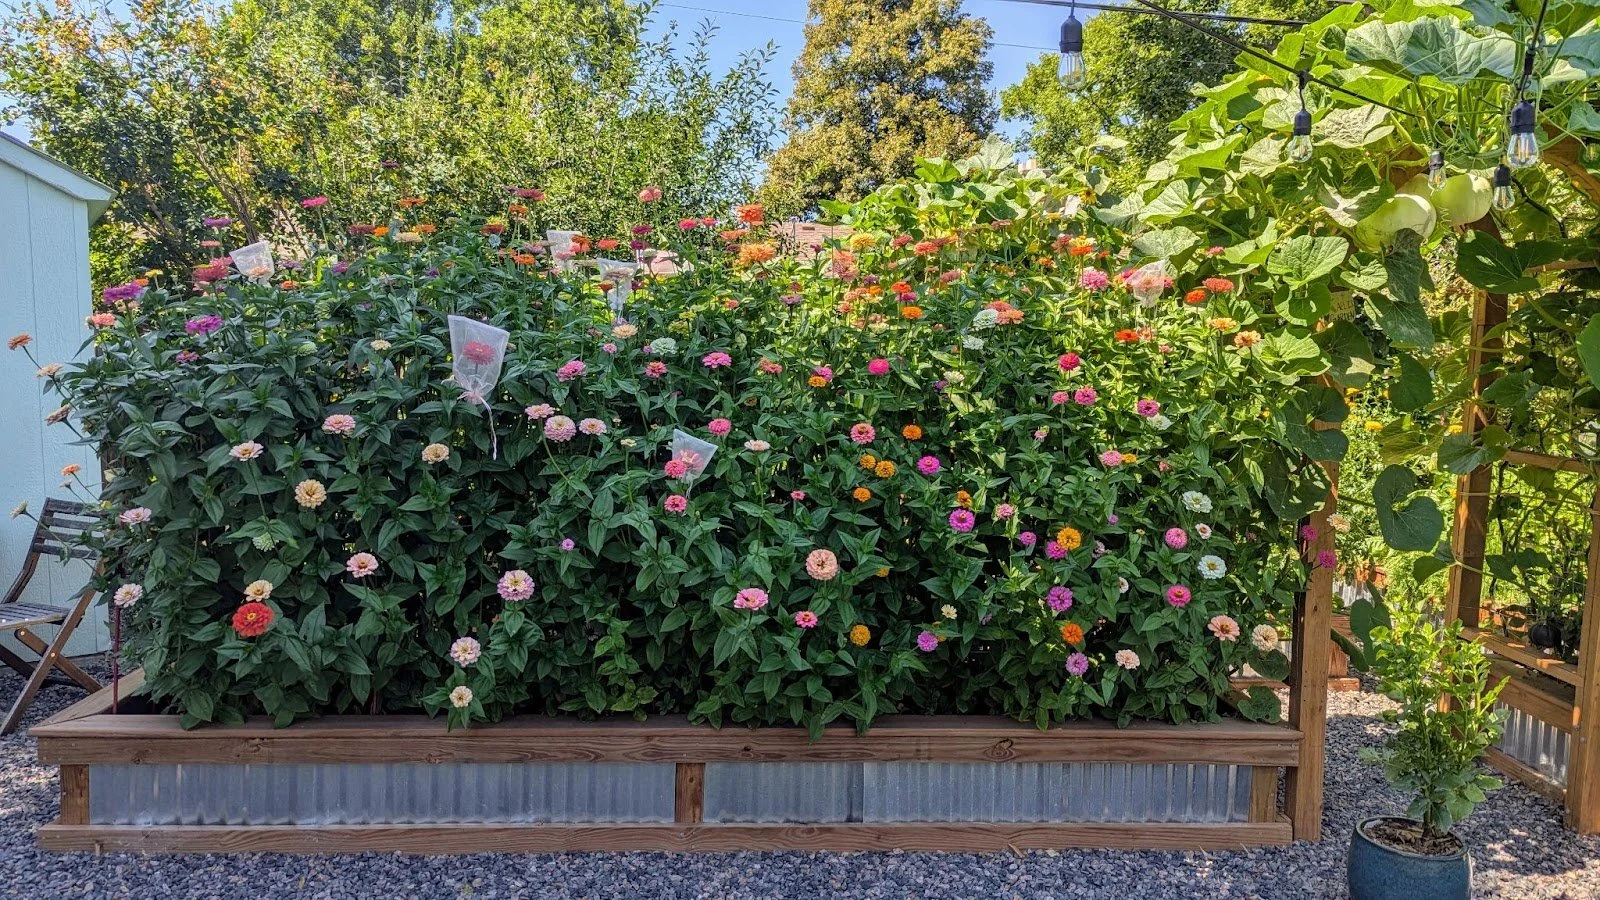
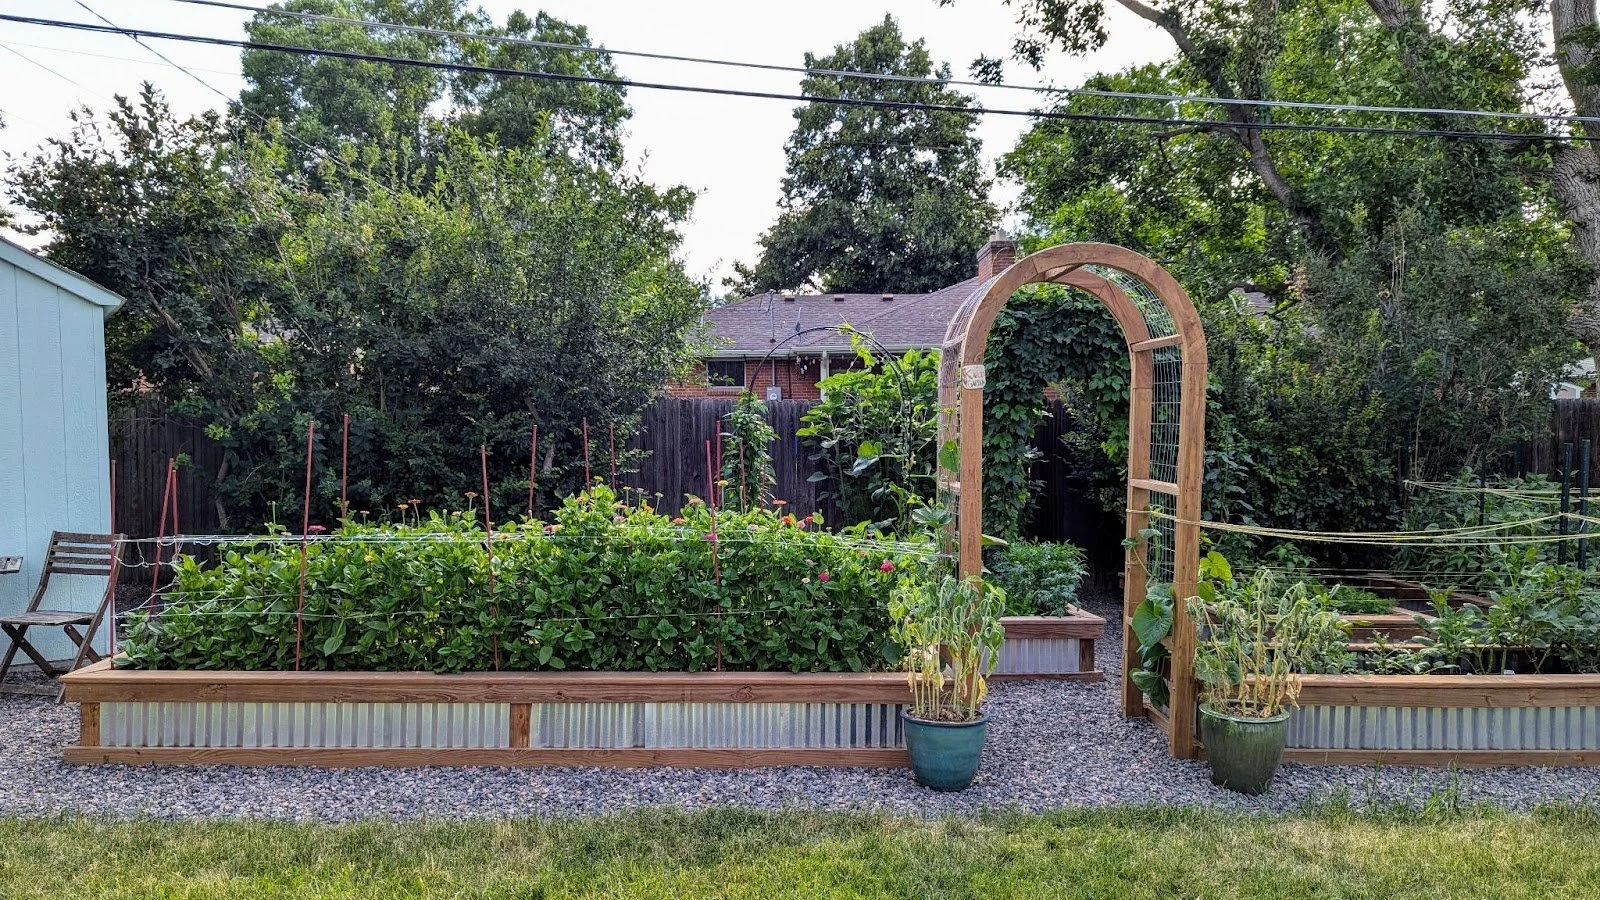
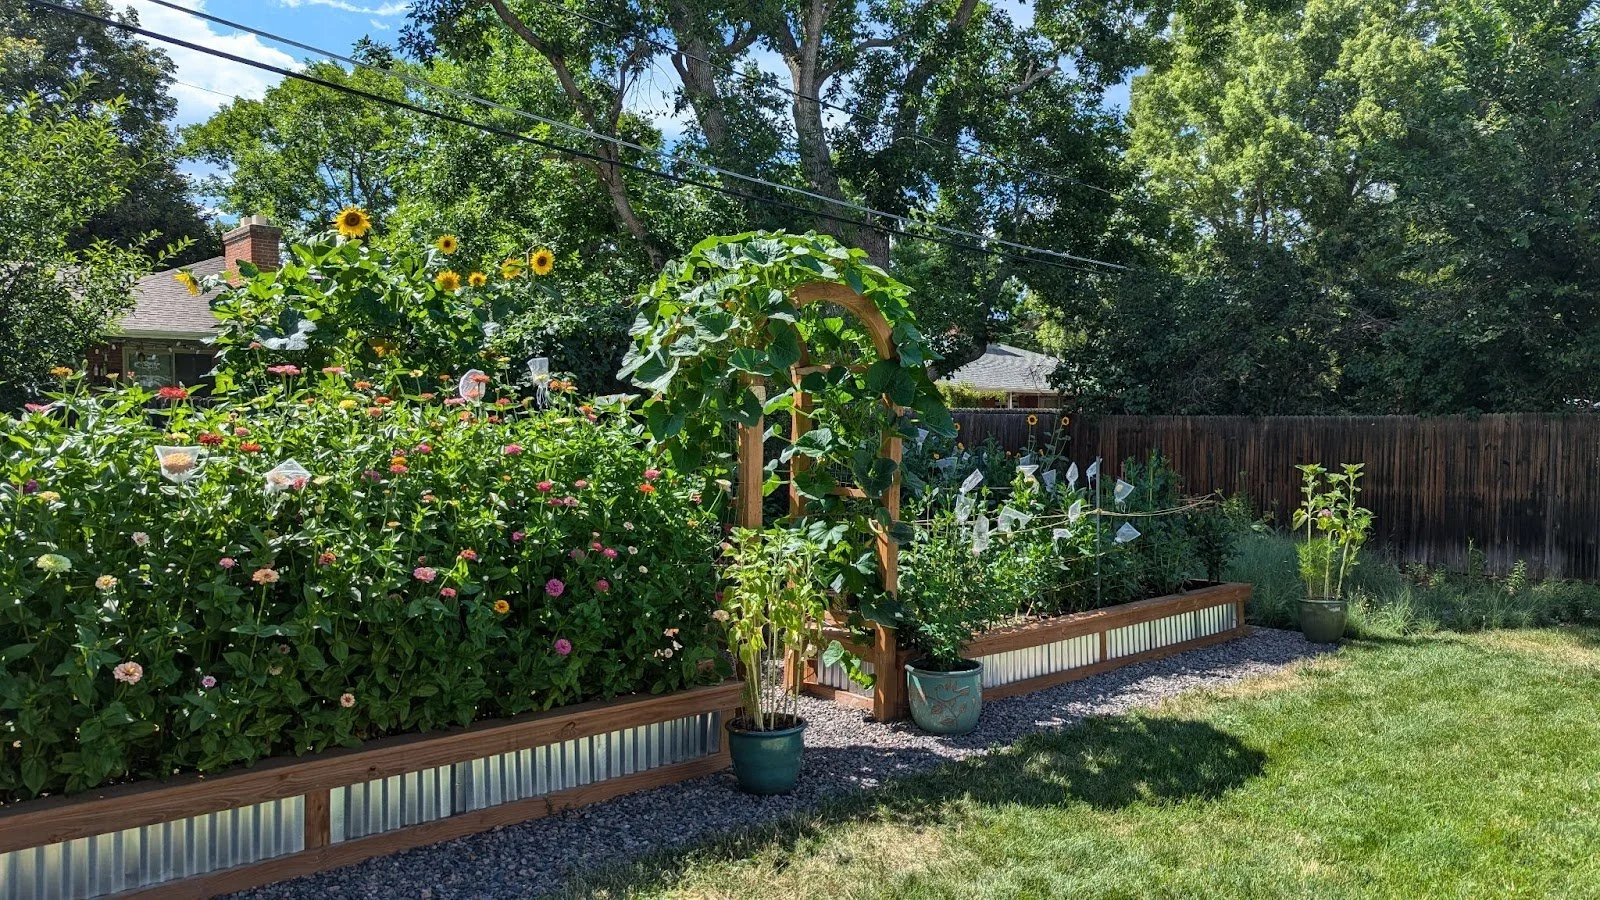
This year, I grew a 7-foot tall zinnia wall in a 3-foot wide by 13-foot long raised garden bed. It was absolutely stunning, and I'm sharing exactly how I did it so you can create your own zinnia wall at home.
Growing Conditions
Growing Zone: 5b-6a (Denver Metro Area, Colorado)
Soil
My garden bed is built with layered branches, lawn clippings, leaves, homemade compost, native topsoil, lawn removal sod, and OMRI-certified organic compost from A1 Organics. This layered approach creates rich, well-draining soil that zinnias love.
Sun Exposure
The bed receives 7-8 hours of direct sun with eastern, southern, and western exposure. Zinnias are sun-lovers, so aim for at least 6-8 hours of direct sunlight.
Watering Schedule
Weeks 1-4: Drip irrigation for 30 minutes daily, plus hand watering as needed to keep soil moist while seeds germinate.
Week 5 onward: Drip irrigation for 30 minutes every other day.
Note: During heat waves (multiple days over 100°F), I supplemented with additional hand watering whenever the flowers looked droopy.
Pest Management
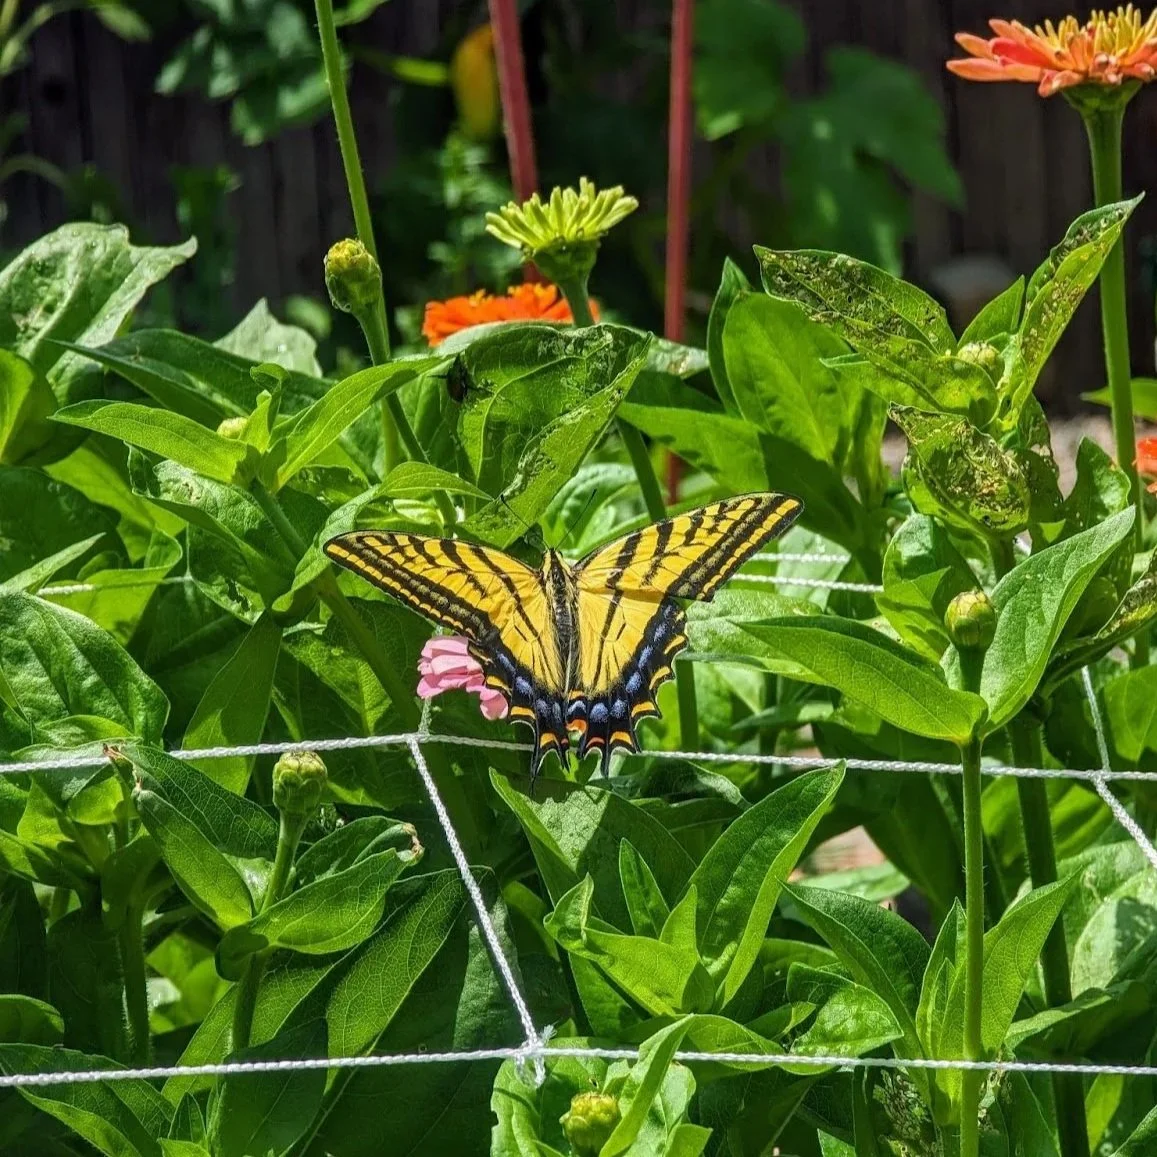
I don't use pesticides or herbicides. If pests become an issue, I protect the flowers with organza bags as needed.
Month-by-Month Timeline
April: Starting Seeds Indoors
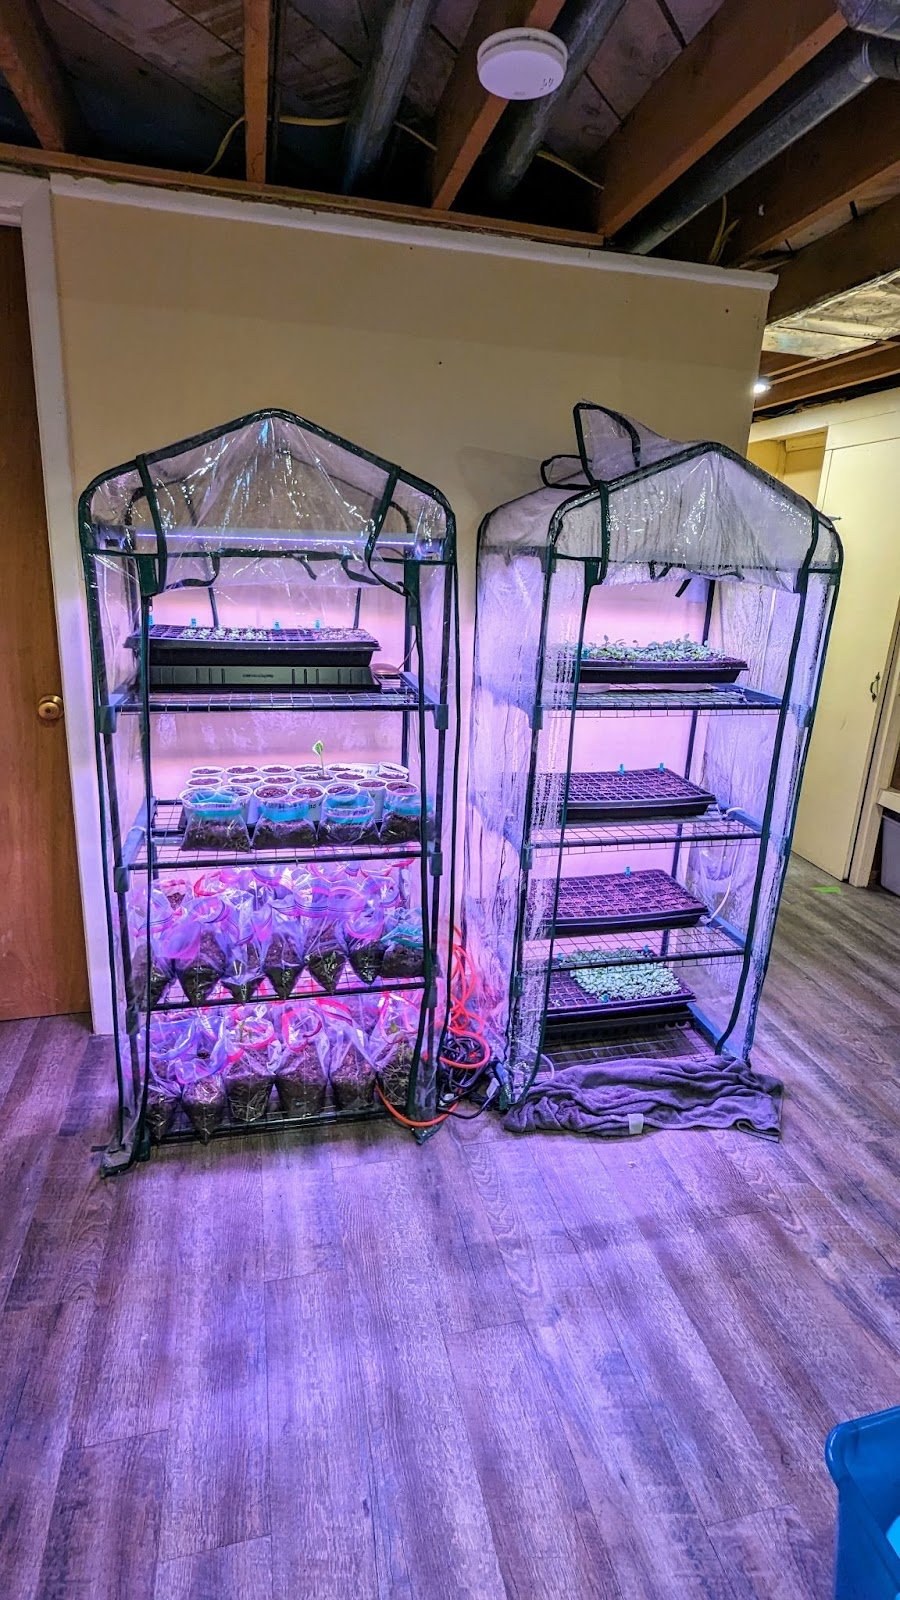
I started some zinnia seeds in seed-starting trays under grow lights in my basement. I used heat mats for the first two weeks, then transferred the trays to grow lights only until they were ready to move outside.
Lesson learned: Going forward, I won't start zinnia seeds indoors at all. The transplants took longer to establish and actually flowered later than the seeds I direct-sowed. Save yourself the effort — direct sow instead!
May: Hardening Off & Planting
My last frost date was around May 10th. One week before transplanting, I started hardening off (acclimating) my seedlings by placing them outside during the day and in the garage overnight to acclimate to temperature changes.
To prep the garden bed, I topped it with fresh compost and enabled the drip irrigation system.
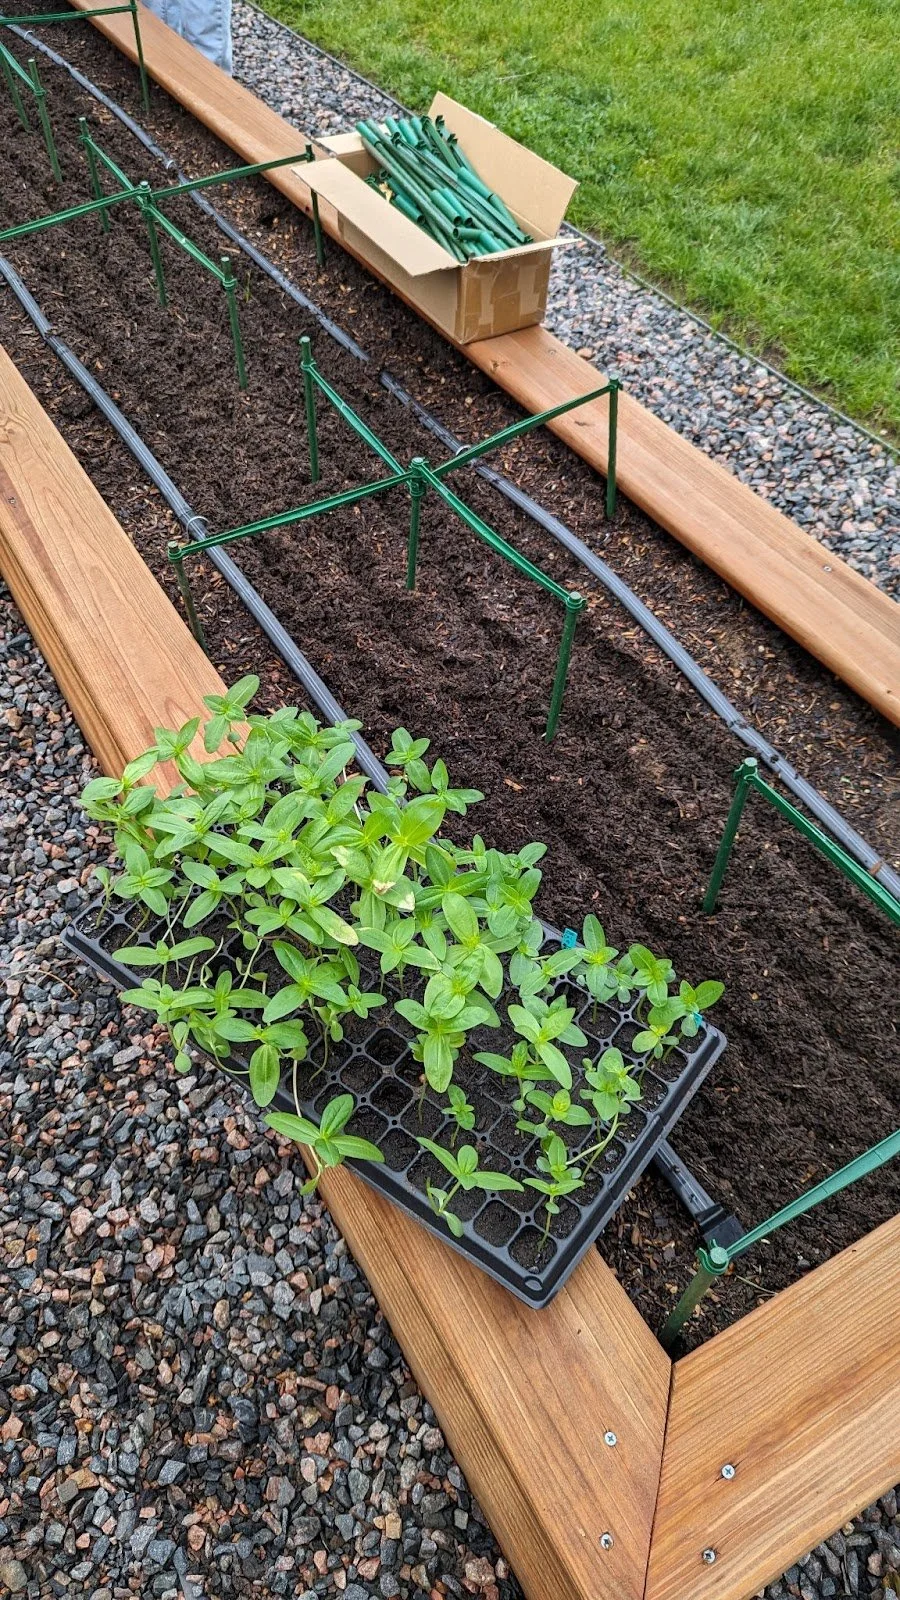
When planting time arrived, I planted everything at once — both direct-sowing seeds and transplanting seedlings. I kept the top of the soil consistently moist for seed germination. For the first week, I covered the bed with frost cloth to protect seedlings on cold nights.

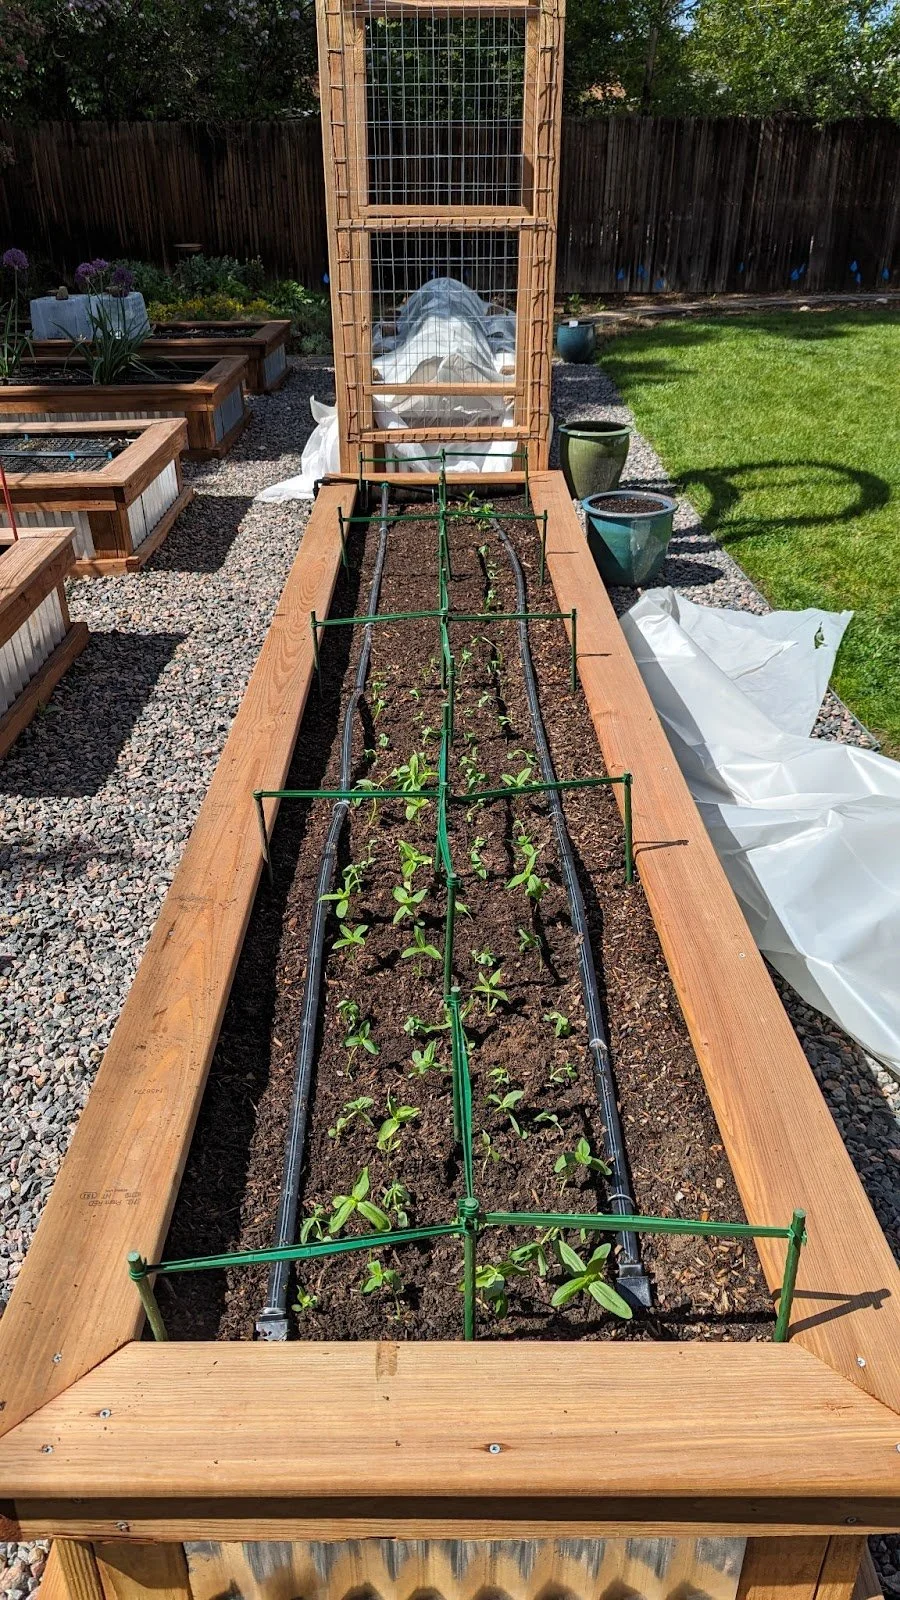
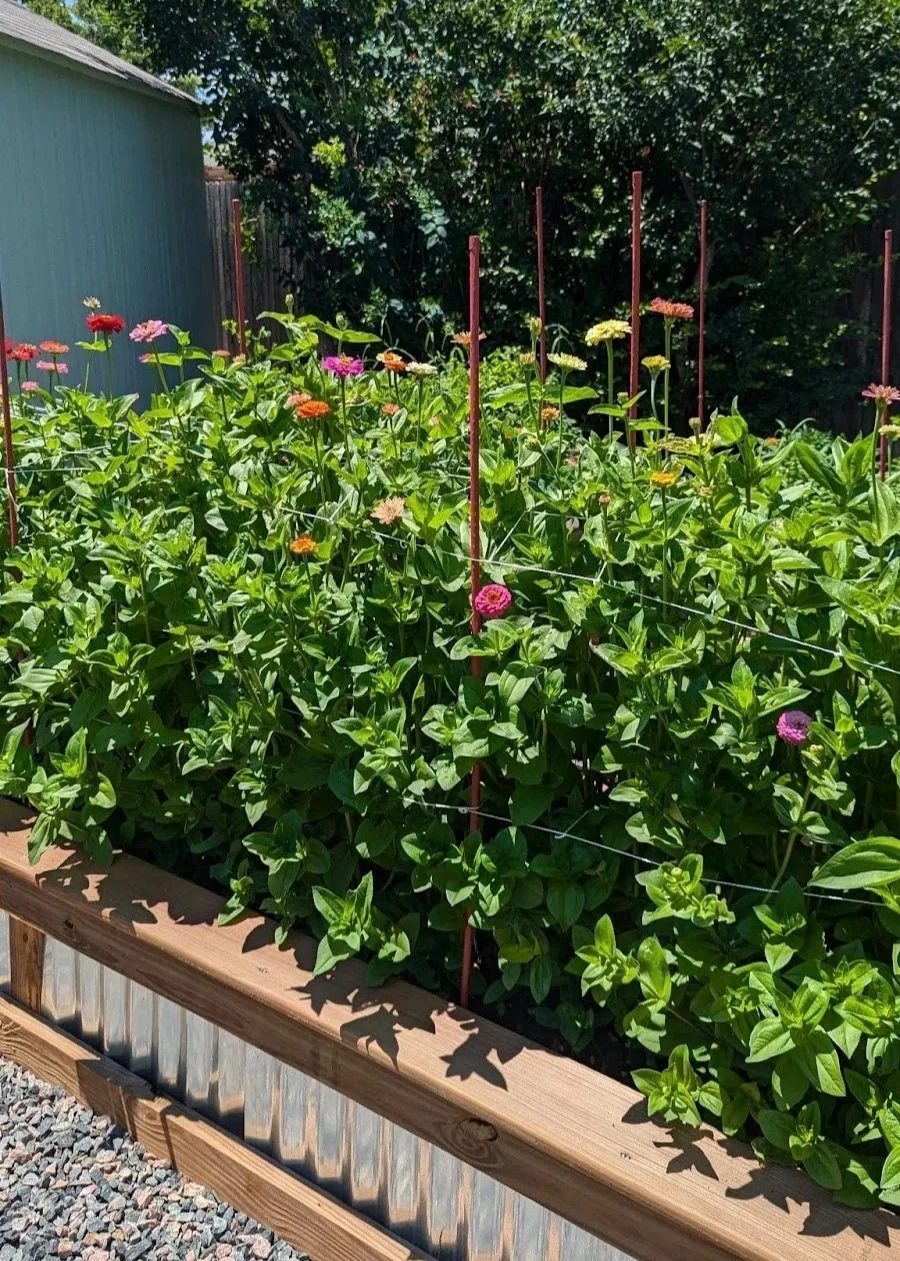
June: Trellising & Pinching
When seedlings reached around 14 inches tall, I added trellis netting by anchoring it to garden bed posts and my arbor. I installed two layers of netting:
First layer: approximately 14 inches above the bed
Second layer: approximately 30 inches above the bed
In hindsight, I should have added a third layer at 48 inches for even better support.
The pinching technique: When zinnia stems reached 16-18 inches tall, I cut each stem back down to around 14 inches (just above the first layer of netting). This encourages the stem to thicken at the bottom and branch out, creating multiple blooms at different heights.
As the zinnias grew taller, I continued redirecting any stems that fell out of the netting or grew through the wrong spaces, training them to grow straight up since they naturally want to grow sideways.
First bloom: June 25th!

July & August: Maintaining & Harvesting
I continued threading zinnia stems back into the trellis net spaces by hand as they grew outward. By July, the trellis netting was completely hidden by foliage when viewed from the side.
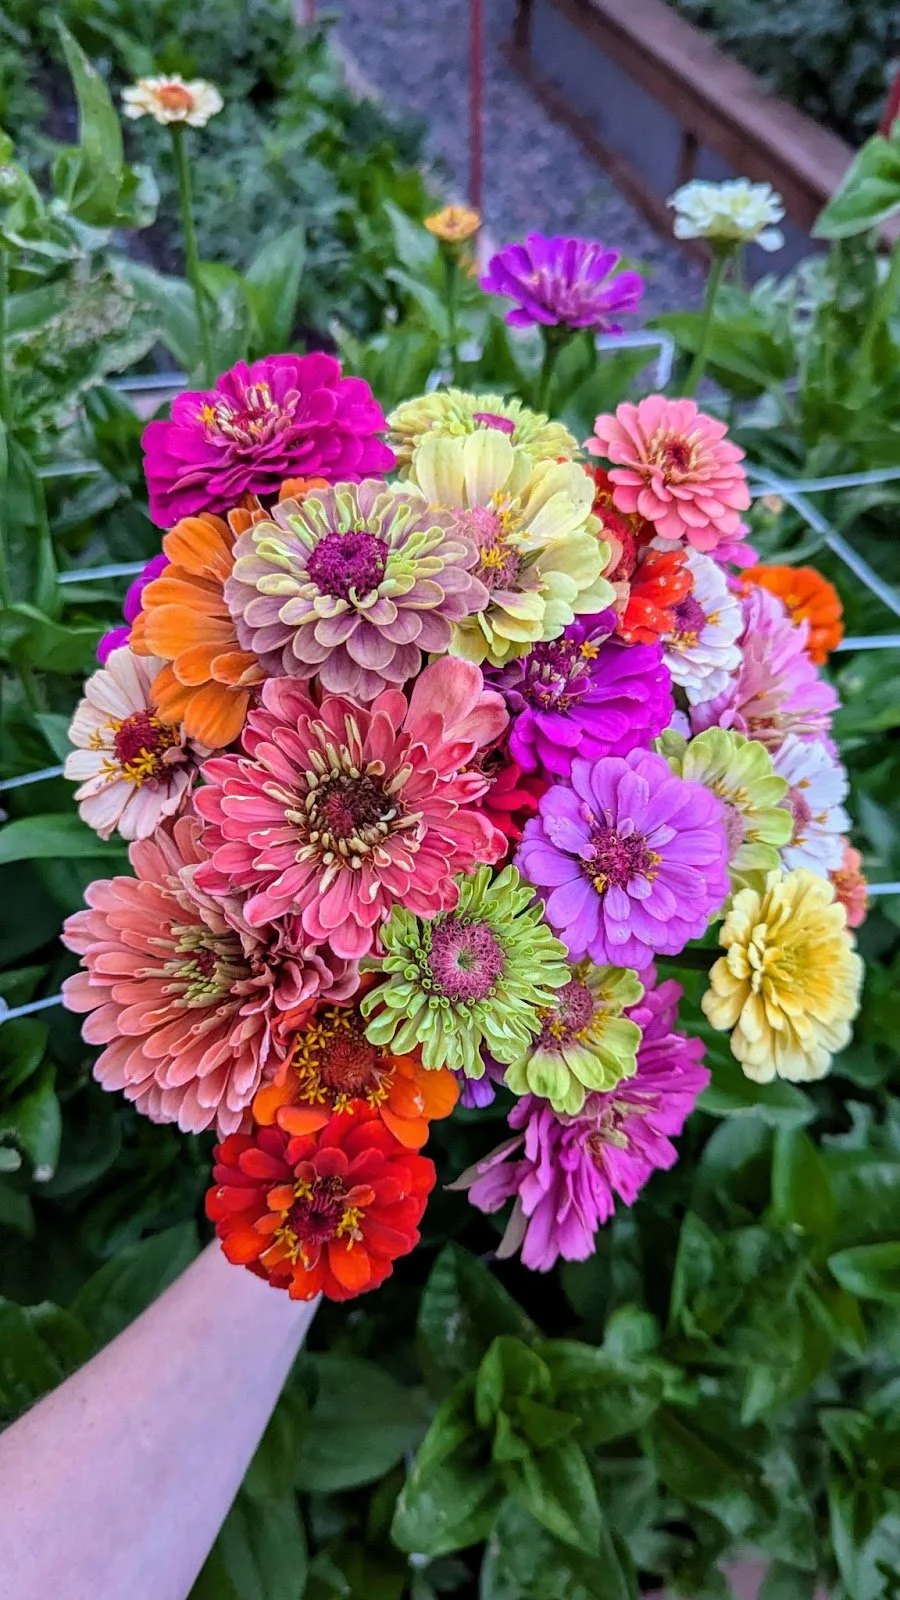
Once stems were mature and long enough, I started enjoying them as cut flowers. The great thing about zinnias is that the more you cut them, the more they bloom!
Cutting Tips for Beautiful Bouquets
Once your zinnias are blooming, here's how to harvest them for the longest-lasting bouquets:
When to Cut
A zinnia is ready to harvest when you shake the stem about 12 inches below the flower and the flower stays stiff. If it's not mature yet, the flower will jiggle noticeably.
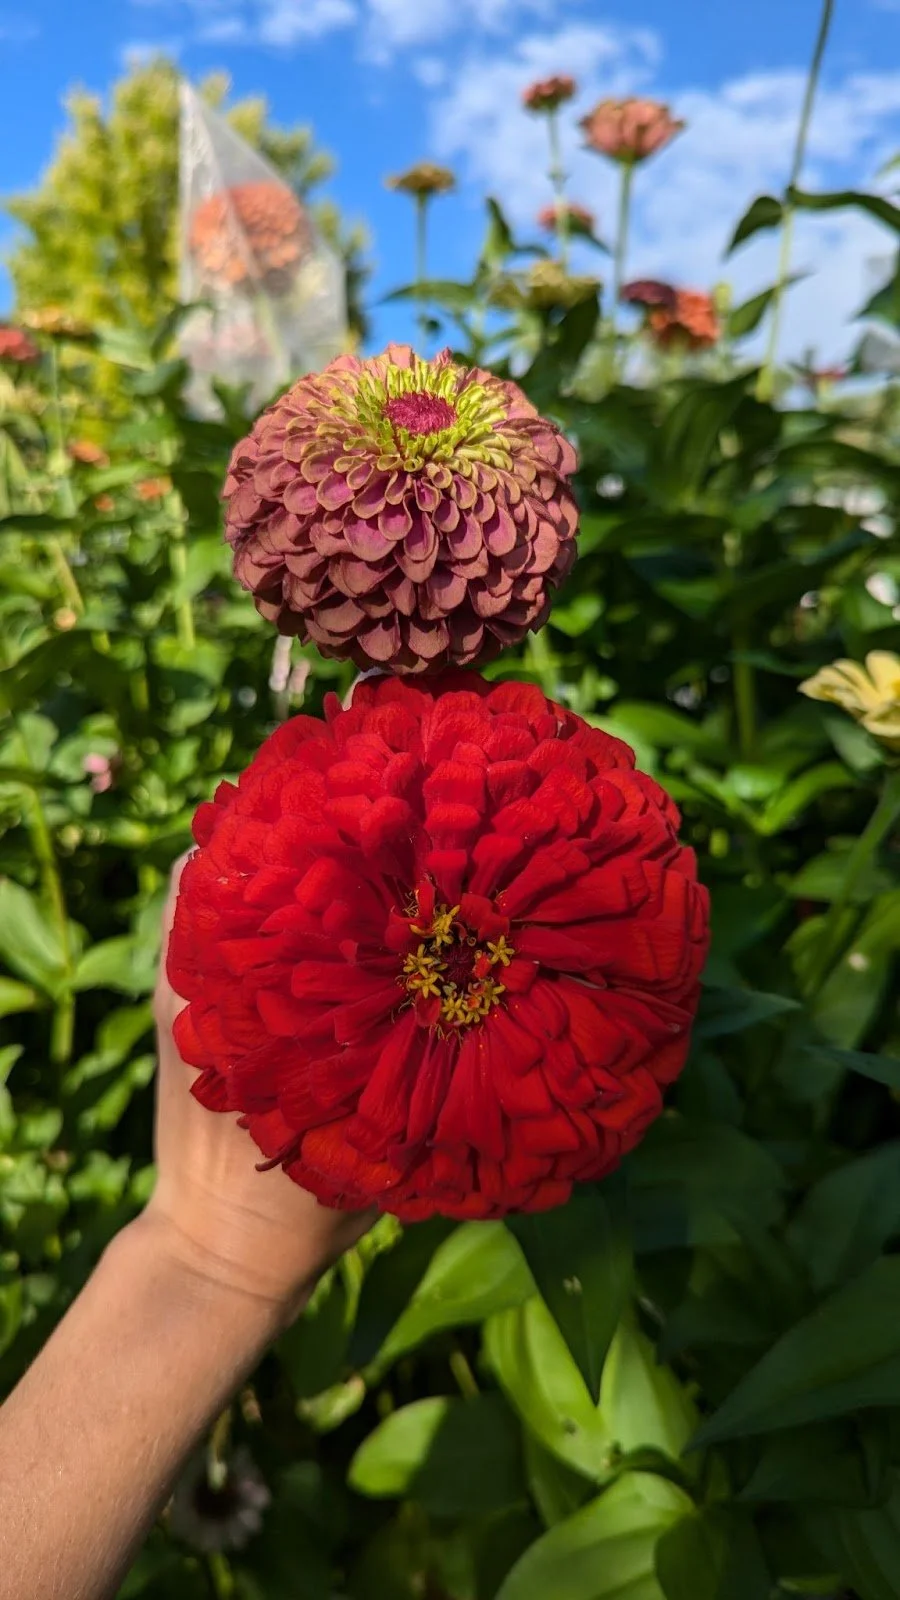
How to Cut
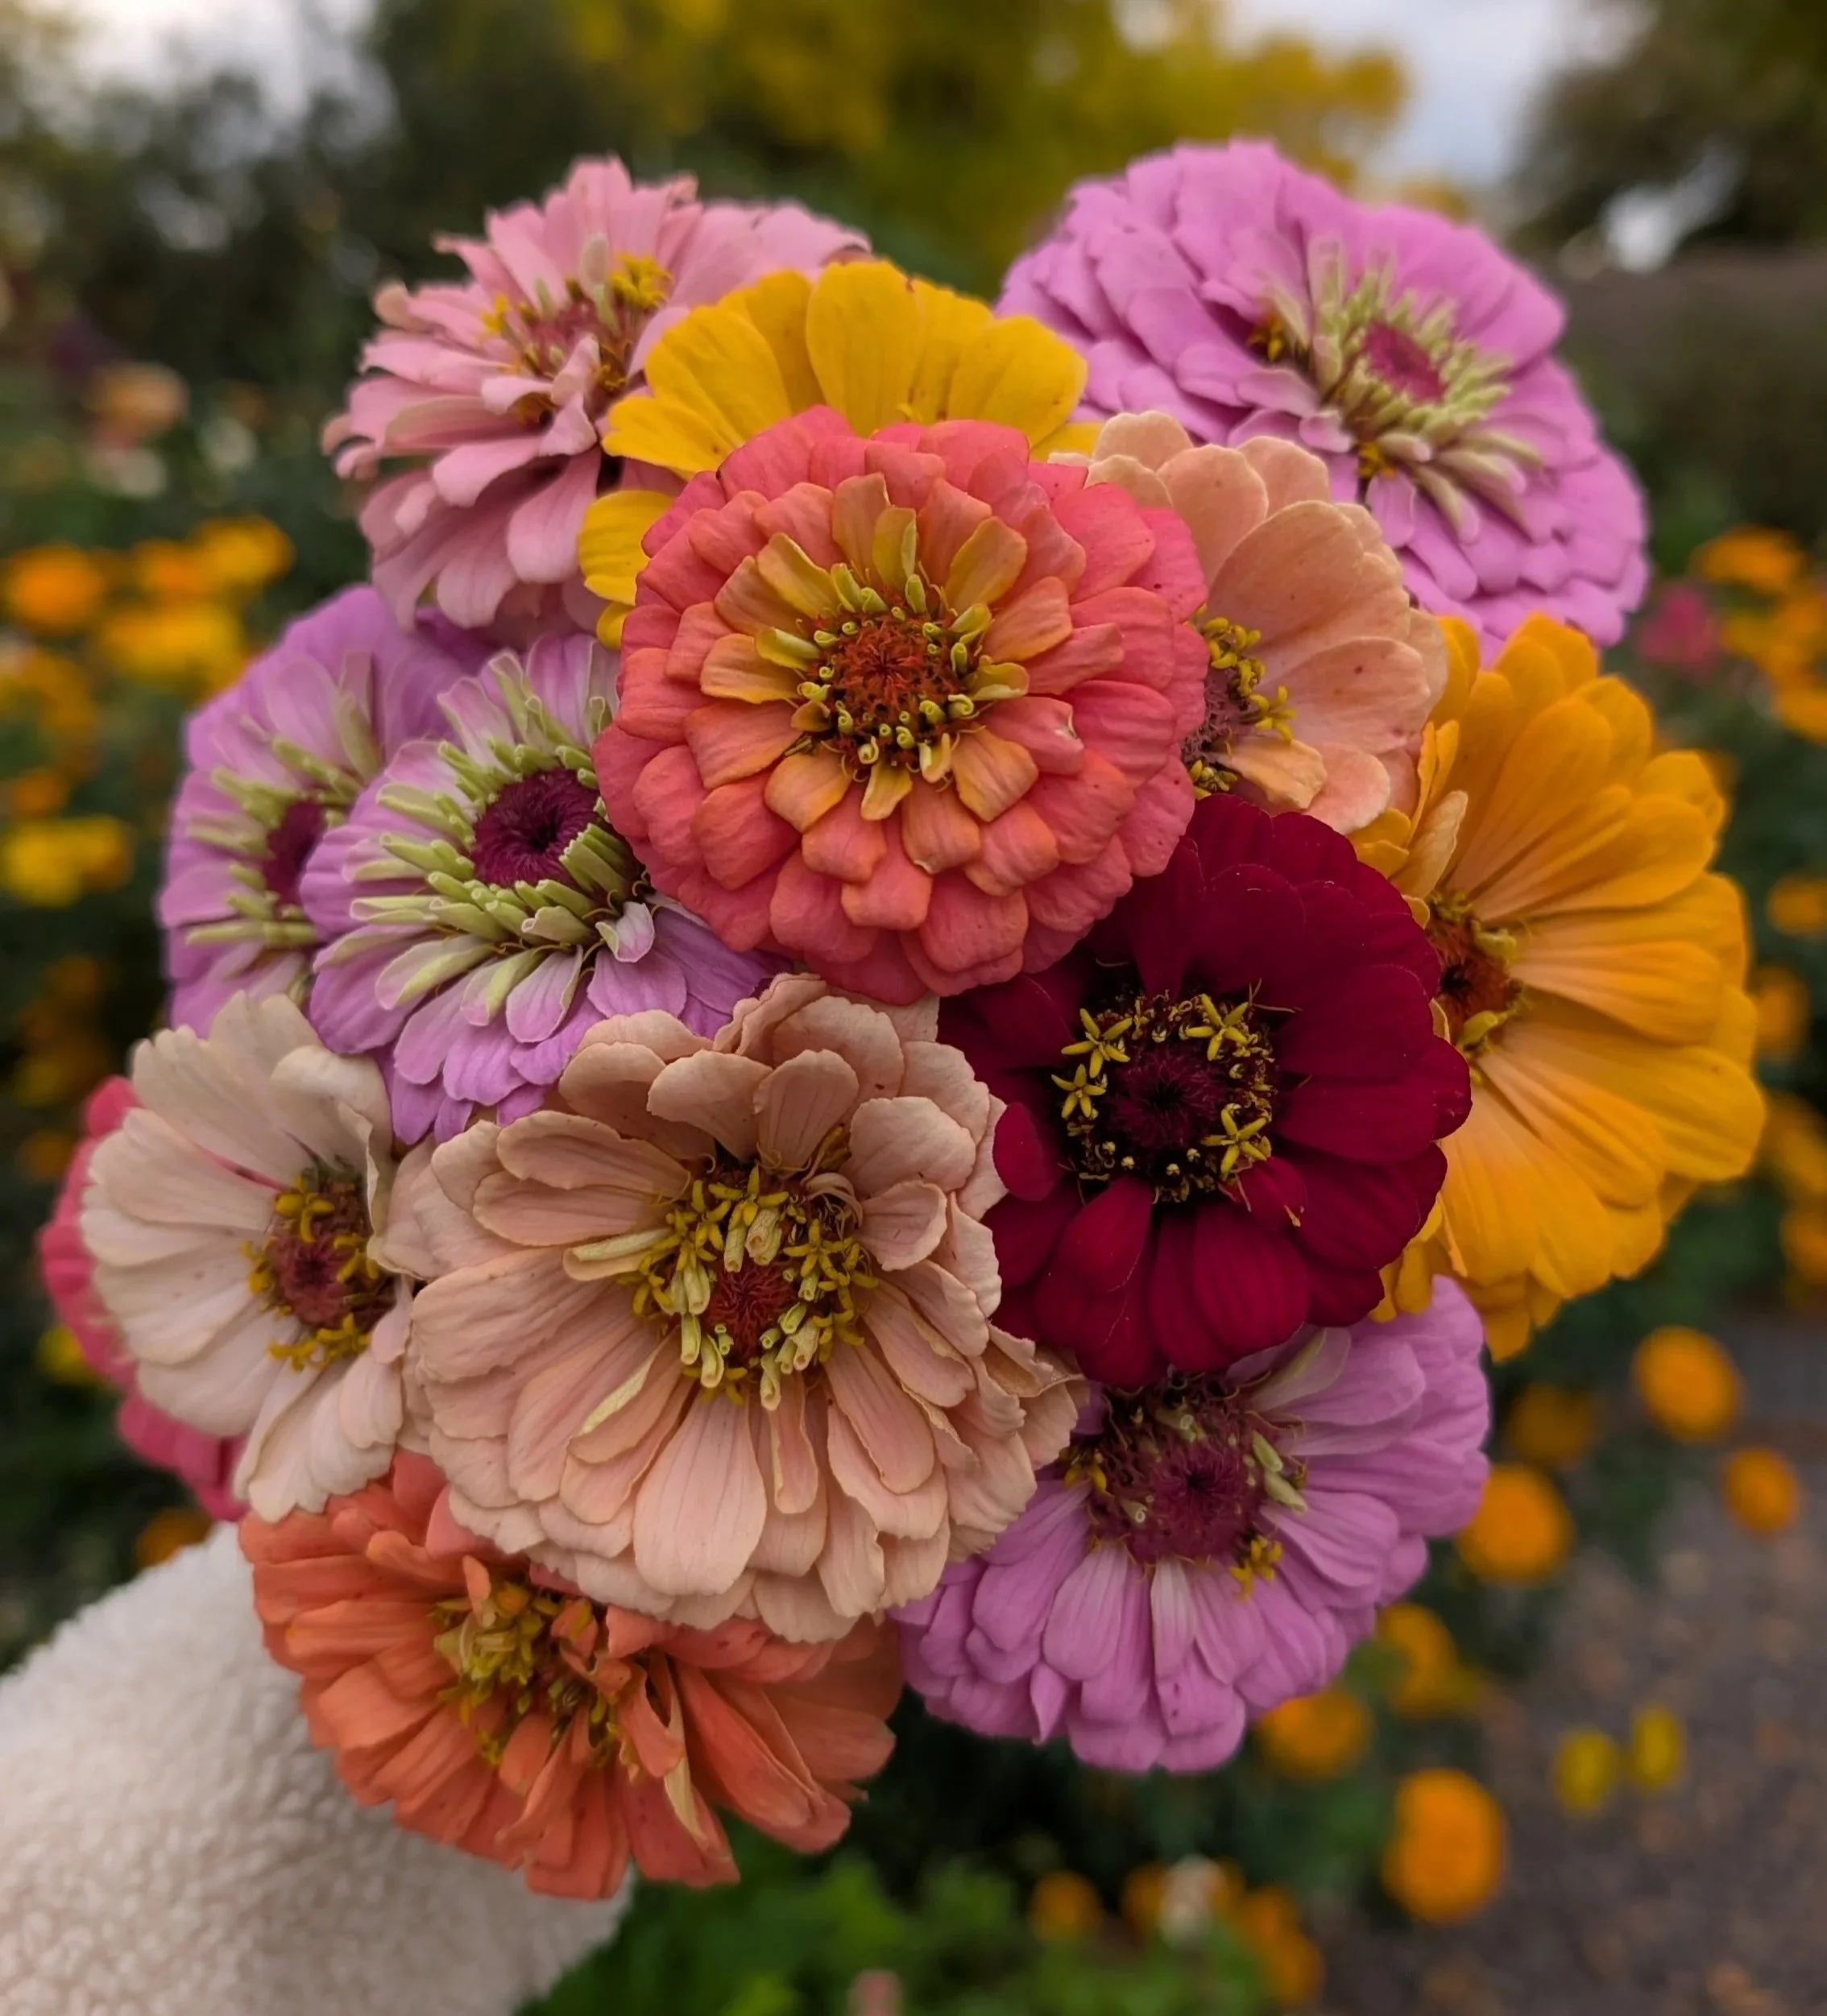
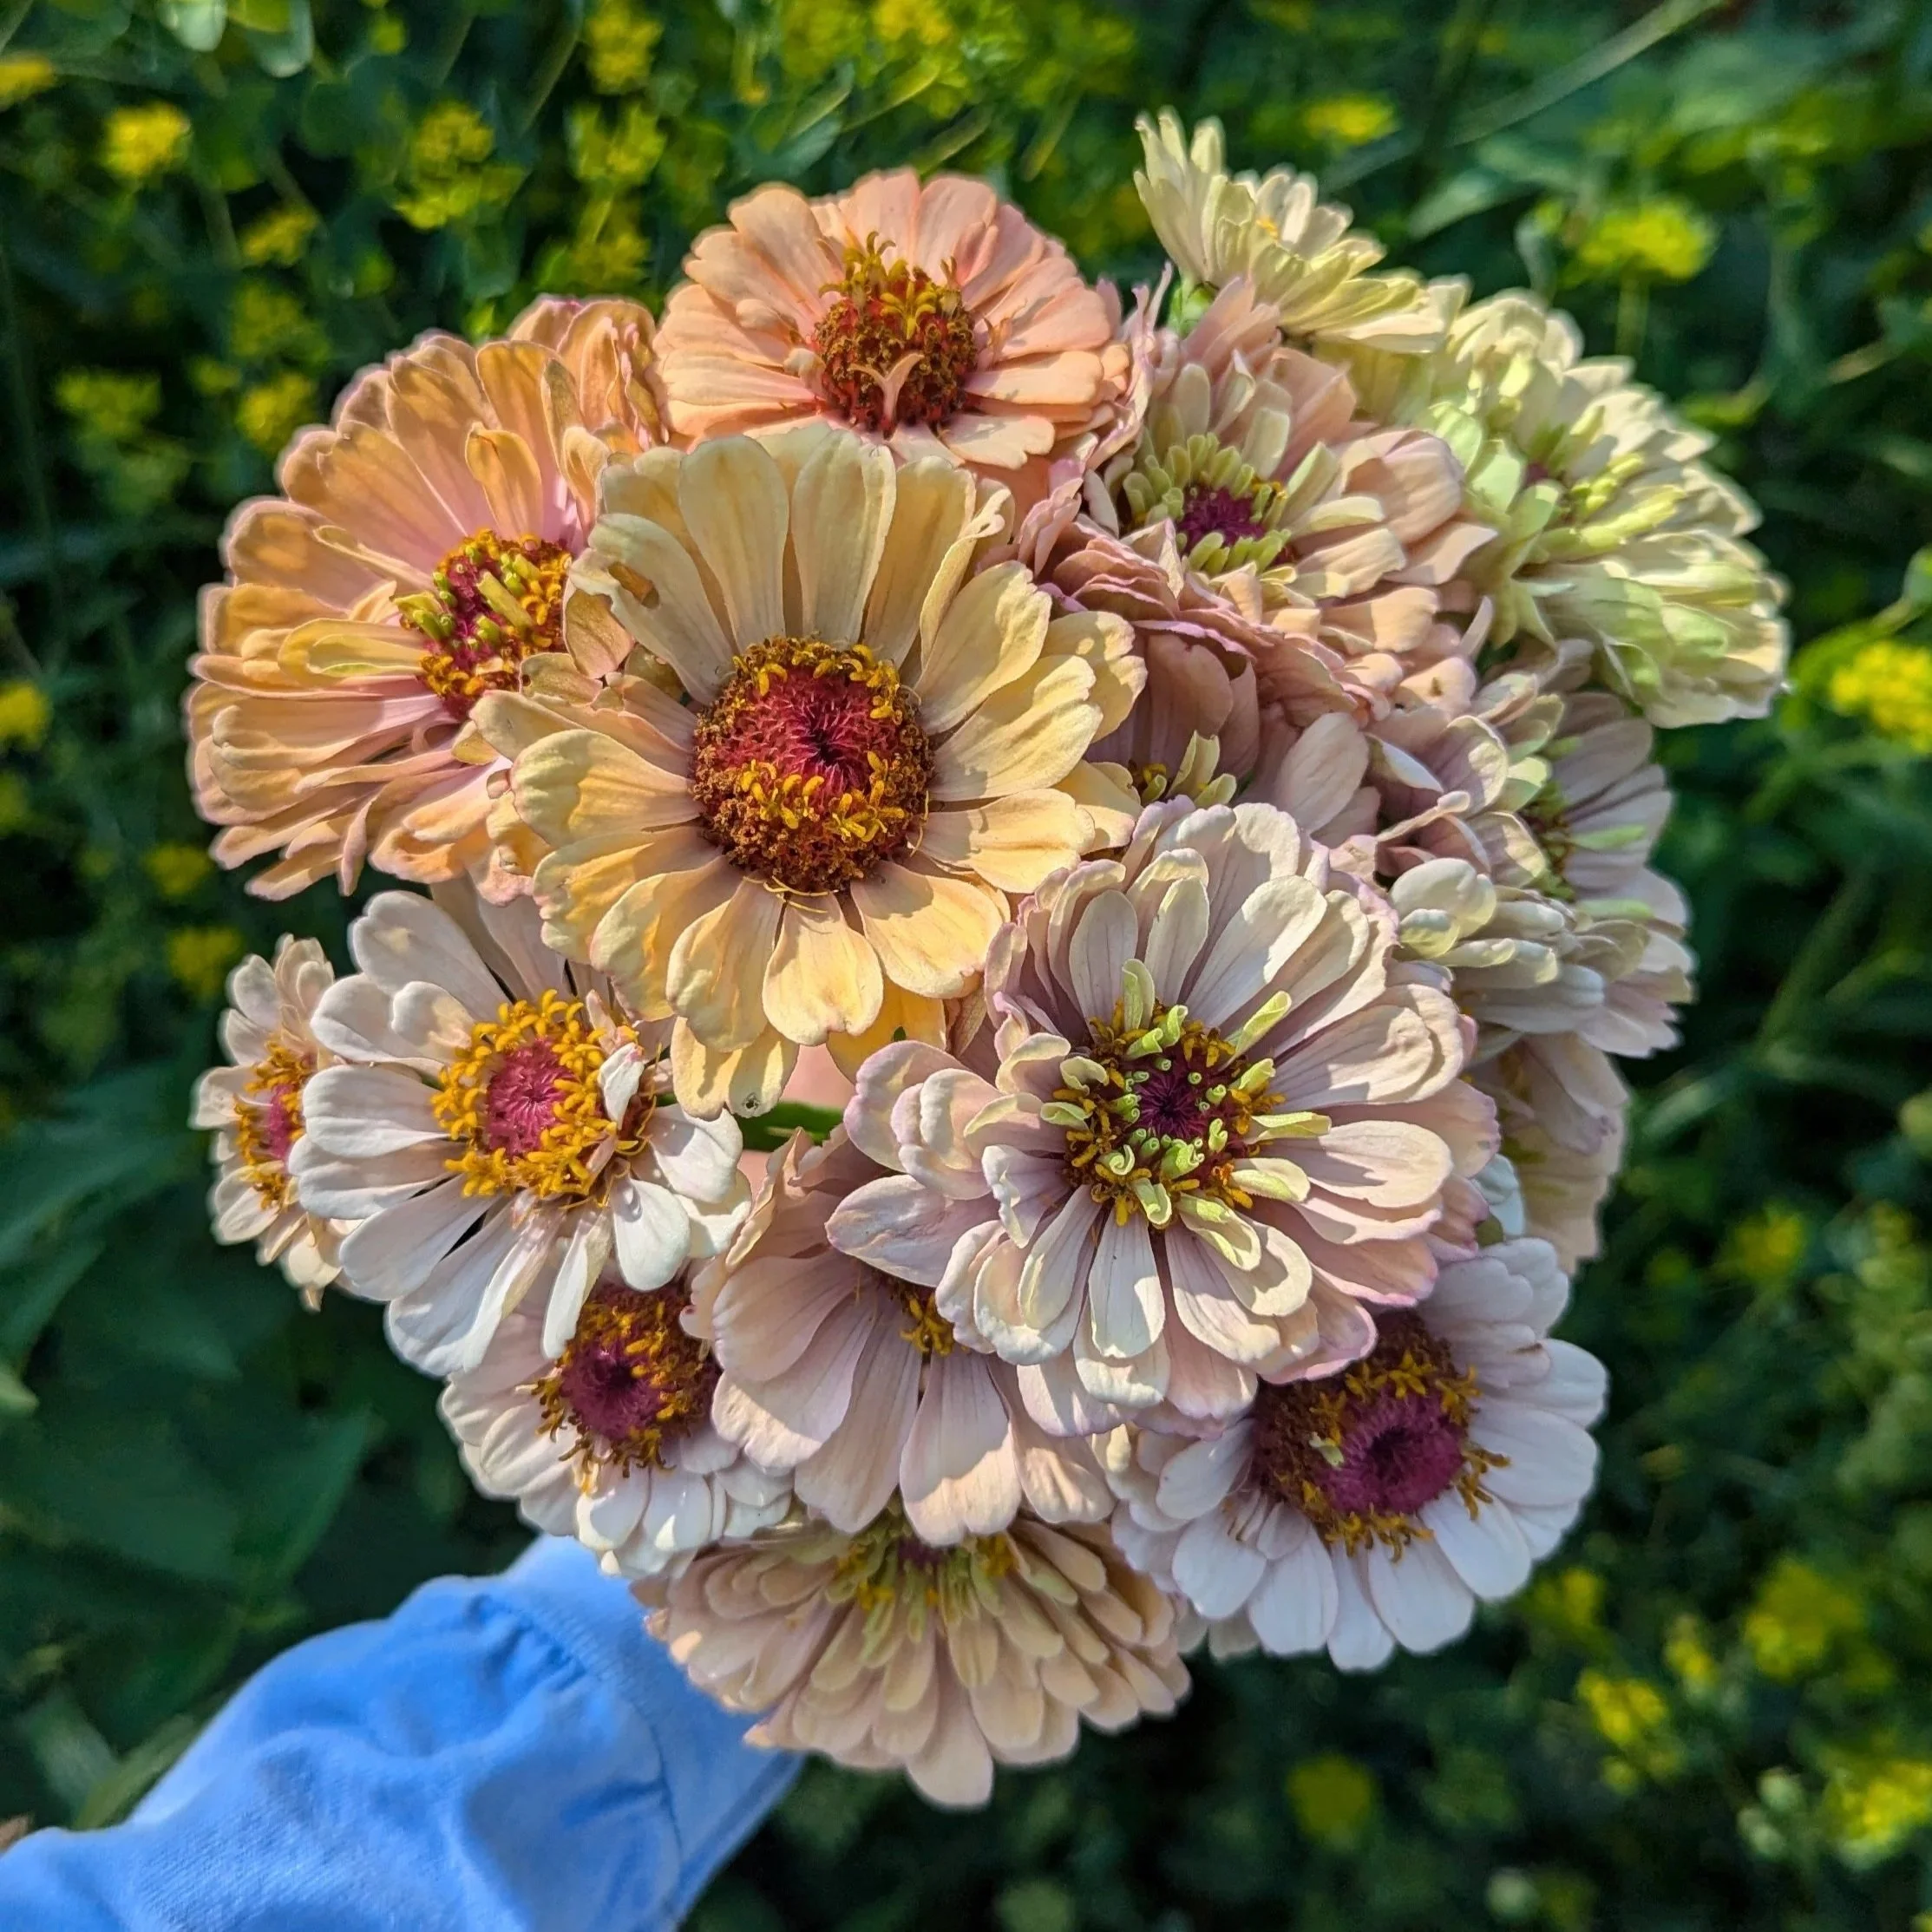
Cut deeply down the stem—at least 20 inches—to encourage taller, stronger new growth. The longer you leave a mature flower on the stem, the more petal layers will form, creating big, fluffy blooms. The flowers pictured were left to mature on the stem for 14 days.
Vase Life
Cut zinnias will last 6-9 days in a vase with proper care:
Change the water every other day
Use flower food
Snip an inch off the stem every four days
Seed Saving & Creating Custom Color Mixes
One of the most rewarding aspects of growing zinnias is saving seeds to create your own custom color combinations. Here's how I developed my unique mixes through selective breeding and hand pollination.
When to Harvest Seeds
Leave flowers on the plant until they're completely dried and brown — this usually takes 4-6 weeks after the flower first opens. The seed heads will feel papery and crispy to the touch, and the seeds inside should be firm and dark green to dark brown (not soft or have white streaks).
Timing tip: Plan to harvest seeds before your first frost. If rain is in the forecast, consider cutting mature seed heads early and finishing the drying process indoors to prevent mold.
How to Harvest Seeds
Selecting flowers: Choose your most vigorous plants with the best color, form, and stem strength. These traits will carry forward to the next generation. I avoid saving seeds from the very first or very last blooms of the season, focusing instead on mid-season flowers from my favorite healthy, productive plants.
Harvesting process:
Cut the dried flower heads off or pull the flower heads off the stem
Place flower heads on a plate or pan and store in a dry location for around a week to finish drying
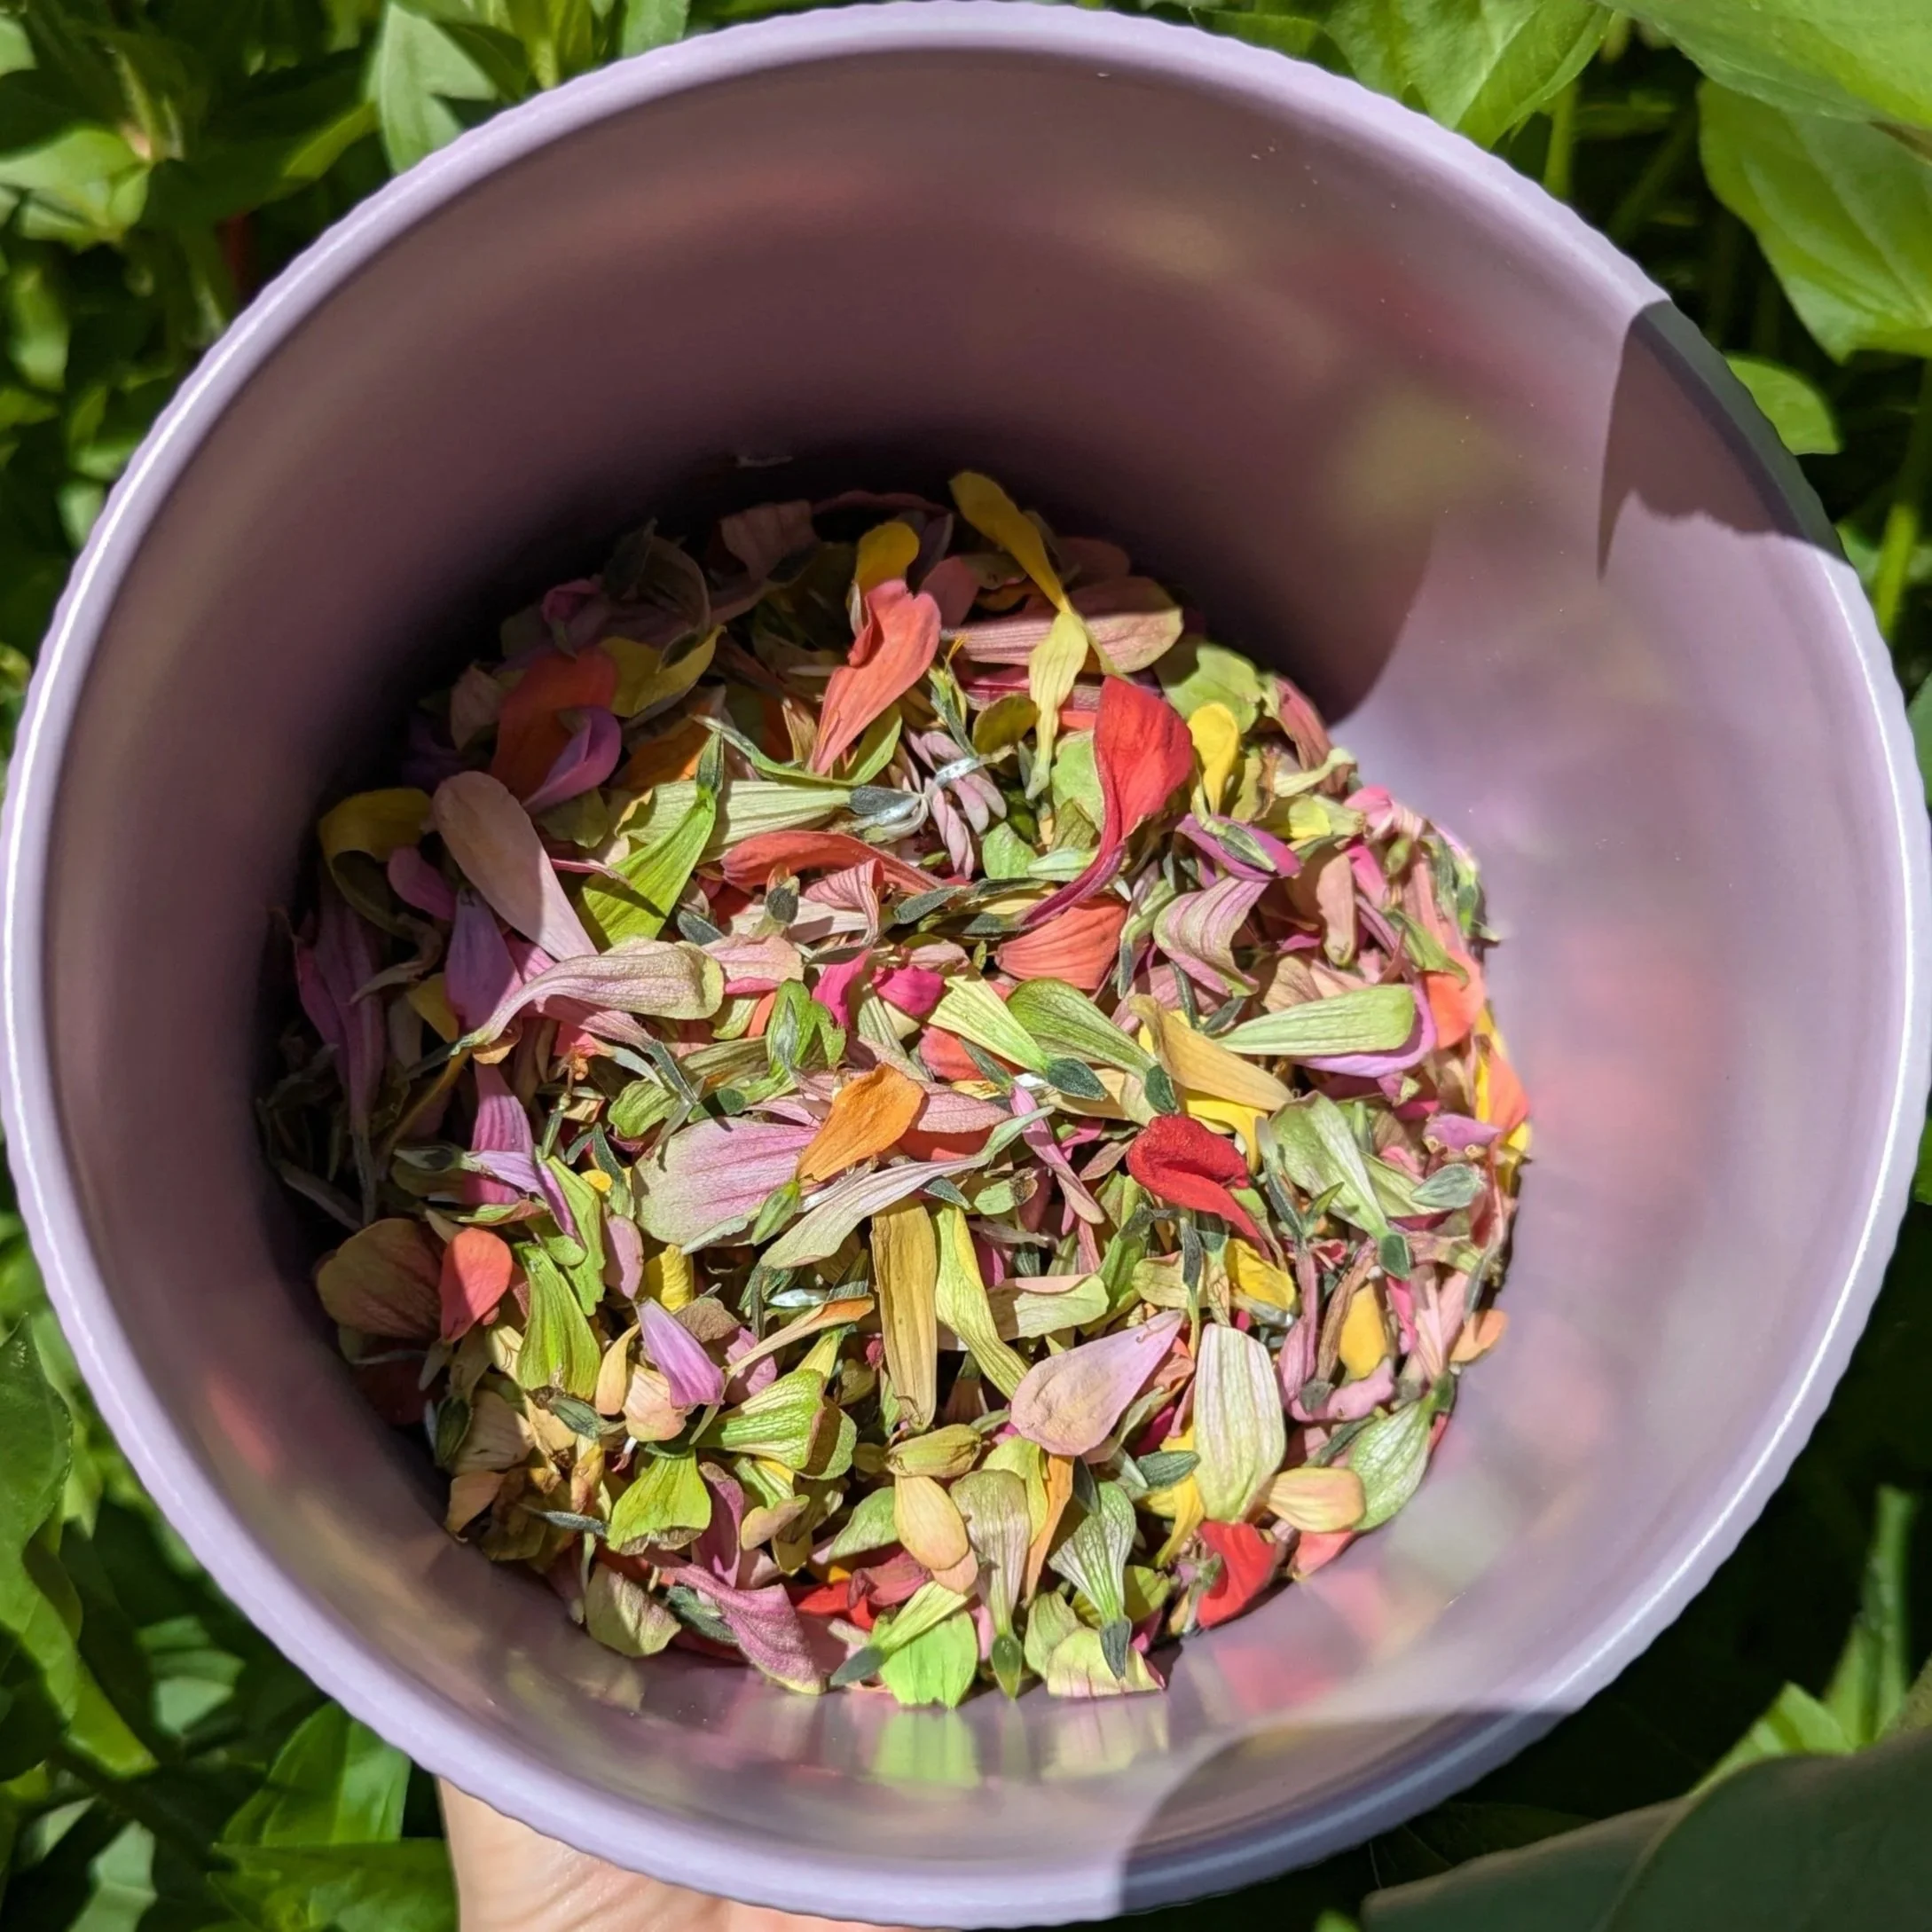
Once fully dry, gently rub the seed head between your hands over a bowl—the seeds will separate easily
(Optional) Remove the leftover petals by using a fine mesh strainer
Store seeds in paper envelopes (not plastic — they need air circulation)
Label with the date and any notes about the seed batch
Keep in a cool, dry place (I use a drawer in my basement)
Properly stored zinnia seeds remain viable with the highest germination rates for around 2 years.
Hand Pollination for Custom Mixes
This is where the magic happens! Zinnias are composite flowers, meaning what looks like a single flower is actually dozens of tiny florets clustered together. Each floret can be pollinated individually, which gives you lots of opportunities to create crosses.
The pollination process:
Timing: Pollinate in mid-morning (8-10 AM) when flowers are fully open and pollen is dry. The center disk florets should look fresh and receptive.
Choosing parent plants: Select one plant for the "mother" (seed parent) and another for the "father" (pollen parent). For example, I might cross a deep magenta with a bright coral to see what color combinations emerge.
The technique:
Using a small, soft paintbrush or cotton swab, gently collect pollen from the center disk of your chosen father plant (you'll see yellow pollen collect on the brush)
Immediately transfer this pollen to the center disk of your mother plant, dabbing gently across the florets
I typically make several passes to ensure good pollen coverage
I’m not overly scientific about my seed collecting process, so I don’t take notes or track color combinations, I just like to see what color zinnias I get the following year
Optional:
Marking pollinated flowers: Tie a small piece of yarn or thread around the stem below each hand-pollinated flower. Different colors can represent different crosses (for example, pink yarn for magenta × coral crosses). Write down your crosses in a notebook so you remember what each color represents.
Preventing unwanted pollination: Zinnias are primarily insect-pollinated, so if you want to ensure a specific cross, cover the pollinated flower with a small organza bag until you’re ready to harvest the seeds.
What to expect: Zinnias are open-pollinated, so you'll see variation and exciting new blends in the next generation. Each year, I save seeds only from plants that produce the colors, forms, and vigor I want to see more of. Any extra seeds I don’t keep for my personal stock, I mix together and sell here.
Selection tips for cultivating a custom variety:
Grow out at least 20-30 plants from each cross to see the full range of variation
Tag your favorite plants while they're blooming so you remember which ones to save seeds from
Take photos throughout the season to track which color combinations work best together
It takes 3-4 generations of selective saving to stabilize a particular trait or color
The beauty of seed saving is that each year brings new surprises. After five years of growing zinnias, I still love discovering new color combinations I've never seen before — and that's what keeps me coming back season after season!

Recommended Seed Sources
Once you've mastered seed saving, you can create your own custom mixes! Until then, here are my favorite sources: